 SpringCloud实战三十四:sentinel-阿里版的Hystrix
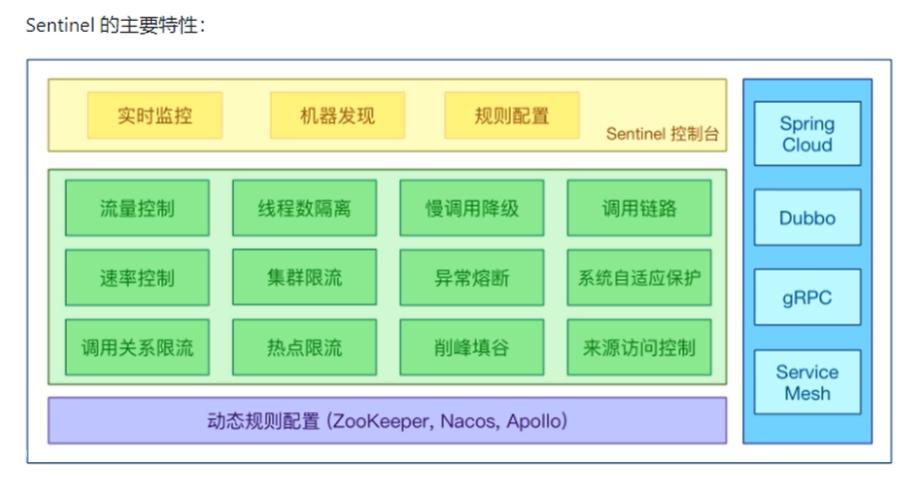
1、特性
2、下载地址:https://github.com/alibaba/sentinel/releases
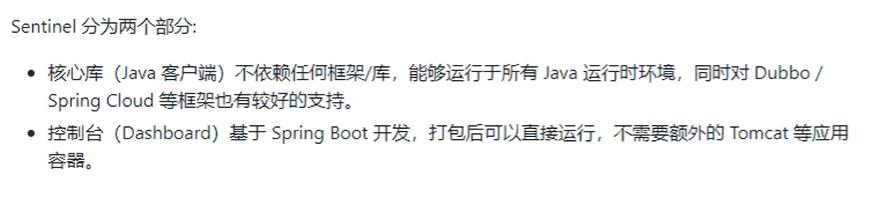
3、组件构成
4、运行sentinel
启动命令:java -jar sentinel-dashboard-1.7.0.jar
访问:localhost:8080
默认账号密码都是sentinel

5、项目整合sentinel
引入依赖
<?xml version="1.0" encoding="UTF-8"?>
<project xmlns="http://maven.apache.org/POM/4.0.0"
         xmlns:xsi="http://www.w3.org/2001/XMLSchema-instance"
         xsi:schemaLocation="http://maven.apache.org/POM/4.0.0 http://maven.apache.org/xsd/maven-4.0.0.xsd">
    <parent>
        <artifactId>cloud2020</artifactId>
        <groupId>com.laoxu.springcloud</groupId>
        <version>1.0-SNAPSHOT</version>
    </parent>
    <modelVersion>4.0.0</modelVersion>

    <artifactId>cloudalibaba-sentinel-service8401</artifactId>
    <dependencies>
        <dependency>
            <groupId>com.alibaba.cloud</groupId>
            <artifactId>spring-cloud-starter-alibaba-nacos-discovery</artifactId>
        </dependency>
        <!-- Springcloud alibaba sentinel- datasource-ngcs后续做持久化用到-->
        <dependency>
            <groupId>com.alibaba.csp</groupId>
            <artifactId>sentinel-datasource-nacos</artifactId>
        </dependency>
        <dependency>
            <groupId>com.alibaba.cloud</groupId>
            <artifactId>spring-cloud-starter-alibabal-sentinel</artifactId>
        </dependency>
        <dependency>
            <groupId>org.springframework.cloud</groupId>
            <artifactId>spring-cloud-starter-openfeign</artifactId>
        </dependency>
        <dependency>
            <groupId>org.springframework.boot</groupId>
            <artifactId>spring-boot-starter-web</artifactId>
        </dependency>
        <dependency>
            <groupId>org.springframework.boot</groupId>
            <artifactId>spring-boot-starter-actuator</artifactId>
        </dependency>
        <dependency>
            <groupId>org.mybatis.spring.boot</groupId>
            <artifactId>mybatis-spring-boot-starter</artifactId>
        </dependency>
        <dependency>
            <groupId>org.springframework.boot</groupId>
            <artifactId>spring-boot-devtools</artifactId>
            <scope>runtime</scope>
            <optional>true</optional>
        </dependency>
        <dependency>
            <groupId>org.projectlombok</groupId>
            <artifactId>lombok</artifactId>
            <optional>true</optional>
        </dependency>
        <dependency>
            <groupId>org.springframework.boot</groupId>
            <artifactId>spring-boot-starter-test</artifactId>
            <scope>test</scope>
        </dependency>
        <dependency>
            <groupId>com.laoxu.springcloud</groupId>
            <artifactId>cloud-api-common</artifactId>
            <version>1.0-SNAPSHOT</version>
            <scope>compile</scope>
        </dependency>
    </dependencies>

</project>
6、配置端口
server:
  port: 8041

spring:
  application:
    name: cloudalibaba-sentinel-service
  cloud:
    nacos:
      discovery:
        server-addr: localhost:8848
    sentinel:
      transport:
        # 配置sentinel dashboard地址
        dashboard: localhost:8080
        #默认8719端口,假如被占用会自动从8719开始依次+1扫描,直至找到未酸占用的端口
        port: 8719

management:
  endpoints:
    web:
      exposure:
        include: '*'
7、创建启动类
package com.laoxu.springcloud;

import org.springframework.boot.SpringApplication;
import org.springframework.boot.autoconfigure.SpringBootApplication;
import org.springframework.cloud.client.discovery.EnableDiscoveryClient;

@SpringBootApplication
@EnableDiscoveryClient
public class MainApp8041 {

    public static void main(String[] args) {
        SpringApplication.run(MainApp8041.class, args);
    }
}
8、创建控制器
package com.laoxu.springcloud.controller;

import org.springframework.web.bind.annotation.GetMapping;
import org.springframework.web.bind.annotation.RestController;

@RestController
public class FlowLimitController {

    @GetMapping("/testA")
    public String testA(){
        return "-----testA";
    }

    @GetMapping("/testB")
    public String testB(){
        return "-----testB";
    }

}
9、启动nacos和sentinel,并启动服务cloudalibaba-sentinel-service
10、访问:http://localhost:8401/testA、http://localhost:8401/testB
11、查看监控情况
访问:http://localhost:8080/

 恭喜注册成功,快来登录吧!