 SpringCloud 实战三十一:nacos服务配置中心
创建nacos配置中心客户端服务
1、引入依赖
<?xml version="1.0" encoding="UTF-8"?>
<project xmlns="http://maven.apache.org/POM/4.0.0"
         xmlns:xsi="http://www.w3.org/2001/XMLSchema-instance"
         xsi:schemaLocation="http://maven.apache.org/POM/4.0.0 http://maven.apache.org/xsd/maven-4.0.0.xsd">
    <parent>
        <artifactId>cloud2020</artifactId>
        <groupId>com.laoxu.springcloud</groupId>
        <version>1.0-SNAPSHOT</version>
    </parent>
    <modelVersion>4.0.0</modelVersion>

    <artifactId>cloudalibaba-config-nacos-client3377</artifactId>
    <dependencies>
        <dependency>
            <groupId>com.alibaba.cloud</groupId>
            <artifactId>spring-cloud-starter-alibaba-nacos-config</artifactId>
        </dependency>
        <dependency>
            <groupId>com.alibaba.cloud</groupId>
            <artifactId>spring-cloud-starter-alibaba-nacos-discovery</artifactId>
        </dependency>
        <dependency>
            <groupId>org.springframework.boot</groupId>
            <artifactId>spring-boot-starter-web</artifactId>
        </dependency>
        <dependency>
            <groupId>org.springframework.boot</groupId>
            <artifactId>spring-boot-starter-actuator</artifactId>
        </dependency>
        <dependency>
            <groupId>org.mybatis.spring.boot</groupId>
            <artifactId>mybatis-spring-boot-starter</artifactId>
        </dependency>
        <dependency>
            <groupId>org.springframework.boot</groupId>
            <artifactId>spring-boot-devtools</artifactId>
            <scope>runtime</scope>
            <optional>true</optional>
        </dependency>
        <dependency>
            <groupId>org.projectlombok</groupId>
            <artifactId>lombok</artifactId>
            <optional>true</optional>
        </dependency>
        <dependency>
            <groupId>org.springframework.boot</groupId>
            <artifactId>spring-boot-starter-test</artifactId>
            <scope>test</scope>
        </dependency>
        <dependency>
            <groupId>com.laoxu.springcloud</groupId>
            <artifactId>cloud-api-common</artifactId>
            <version>1.0-SNAPSHOT</version>
            <scope>compile</scope>
        </dependency>
    </dependencies>

</project>
2、配置端口
两个配置文件:
bootstrap.yml
server:
  port: 3377

spring:
  application:
    name: nacos-config-client
  cloud:
    nacos:
      discovery:
        server-addr: localhost:8848 # nacos服务注册中心
      config:
        server-addr: localhost:8848
        file-extension: yaml # 指定yaml为配置文件后缀

# ${prefix}-${spring-profile.active}.${file-extension}
# 约定配置文件名
# ${spring.application.name}-${spring.profile.active}.${spring.cloud.nacos.config.file-extension}
# nacos-config-client-dev.yaml
application.yml
spring:
  profiles:
    active: dev
bootstrap.yml优先级高于application.yml
3、控制器
package com.laoxu.springcloud.controller;

import org.springframework.beans.factory.annotation.Value;
import org.springframework.cloud.context.config.annotation.RefreshScope;
import org.springframework.web.bind.annotation.GetMapping;
import org.springframework.web.bind.annotation.RestController;

@RestController
@RefreshScope // 支持配置动态更新
public class ConfigClientController {

    @Value("${config.info}")
    private String configInfo;

    @GetMapping("/config/info")
    public String getConfigInfo(){
        return configInfo;
    }
}
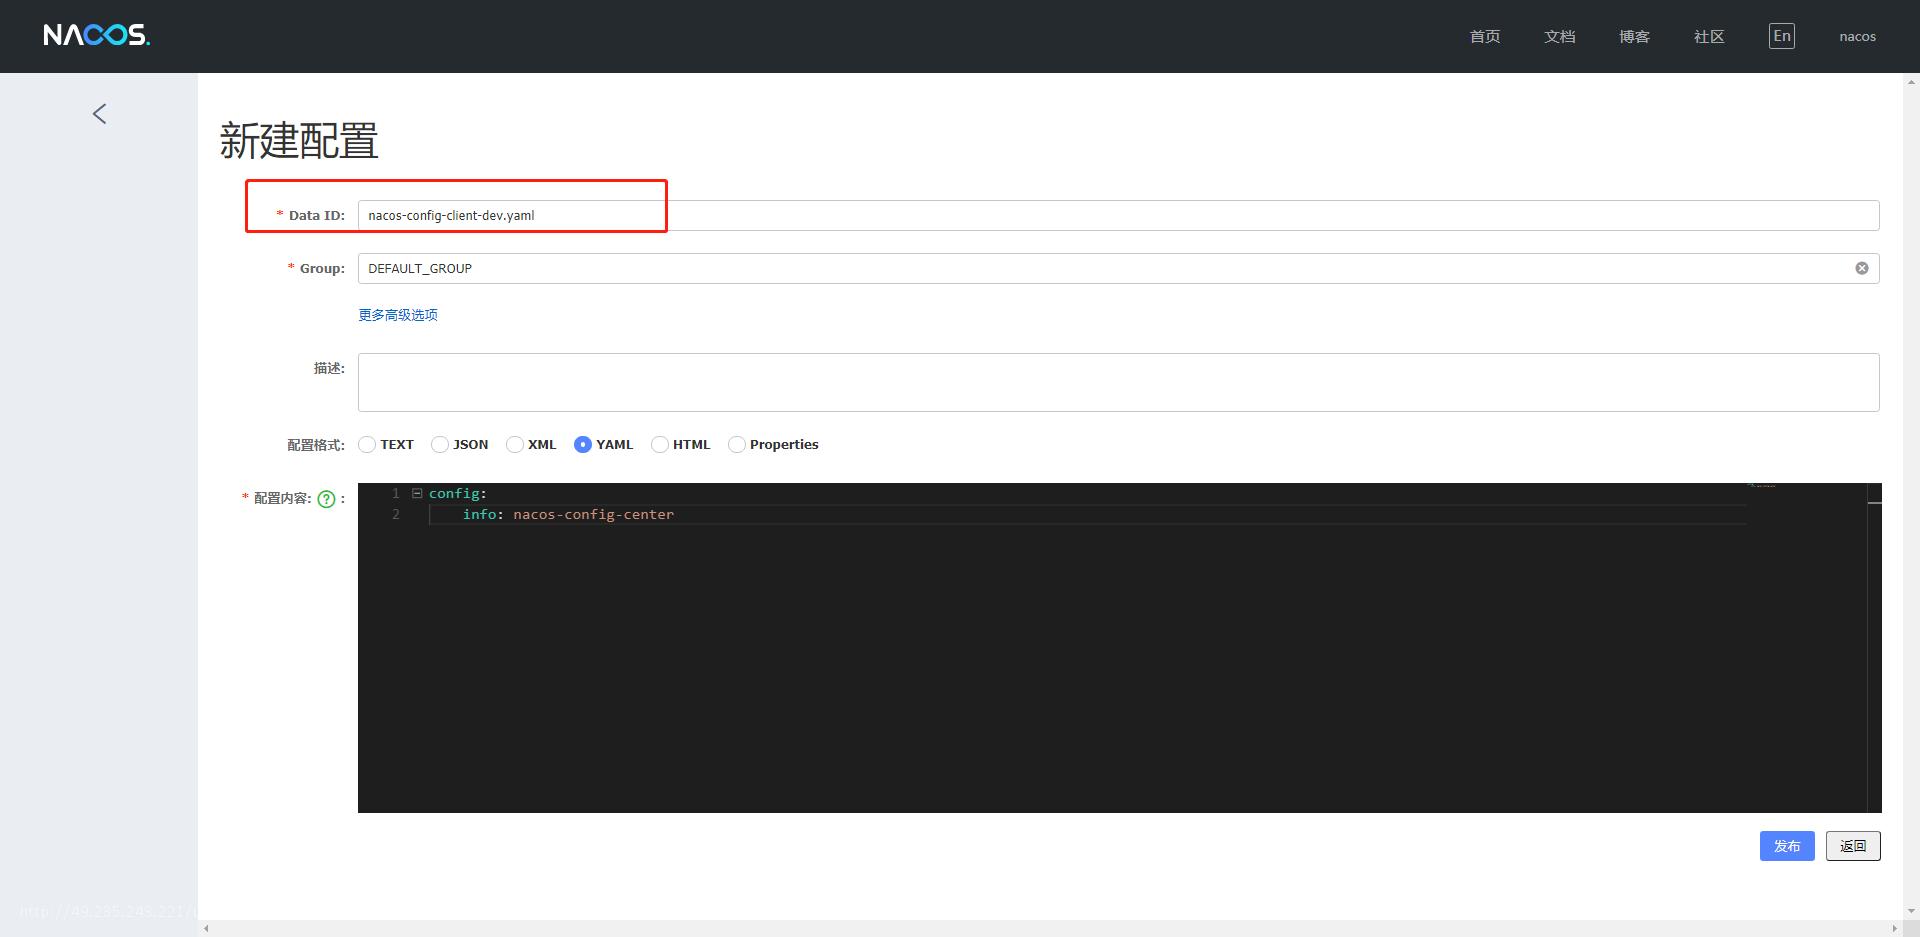
4、nacos配置中心配置

5、启动服务
6、访问:http://localhost:3377/config/info
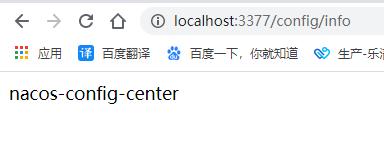
读取配置成功!
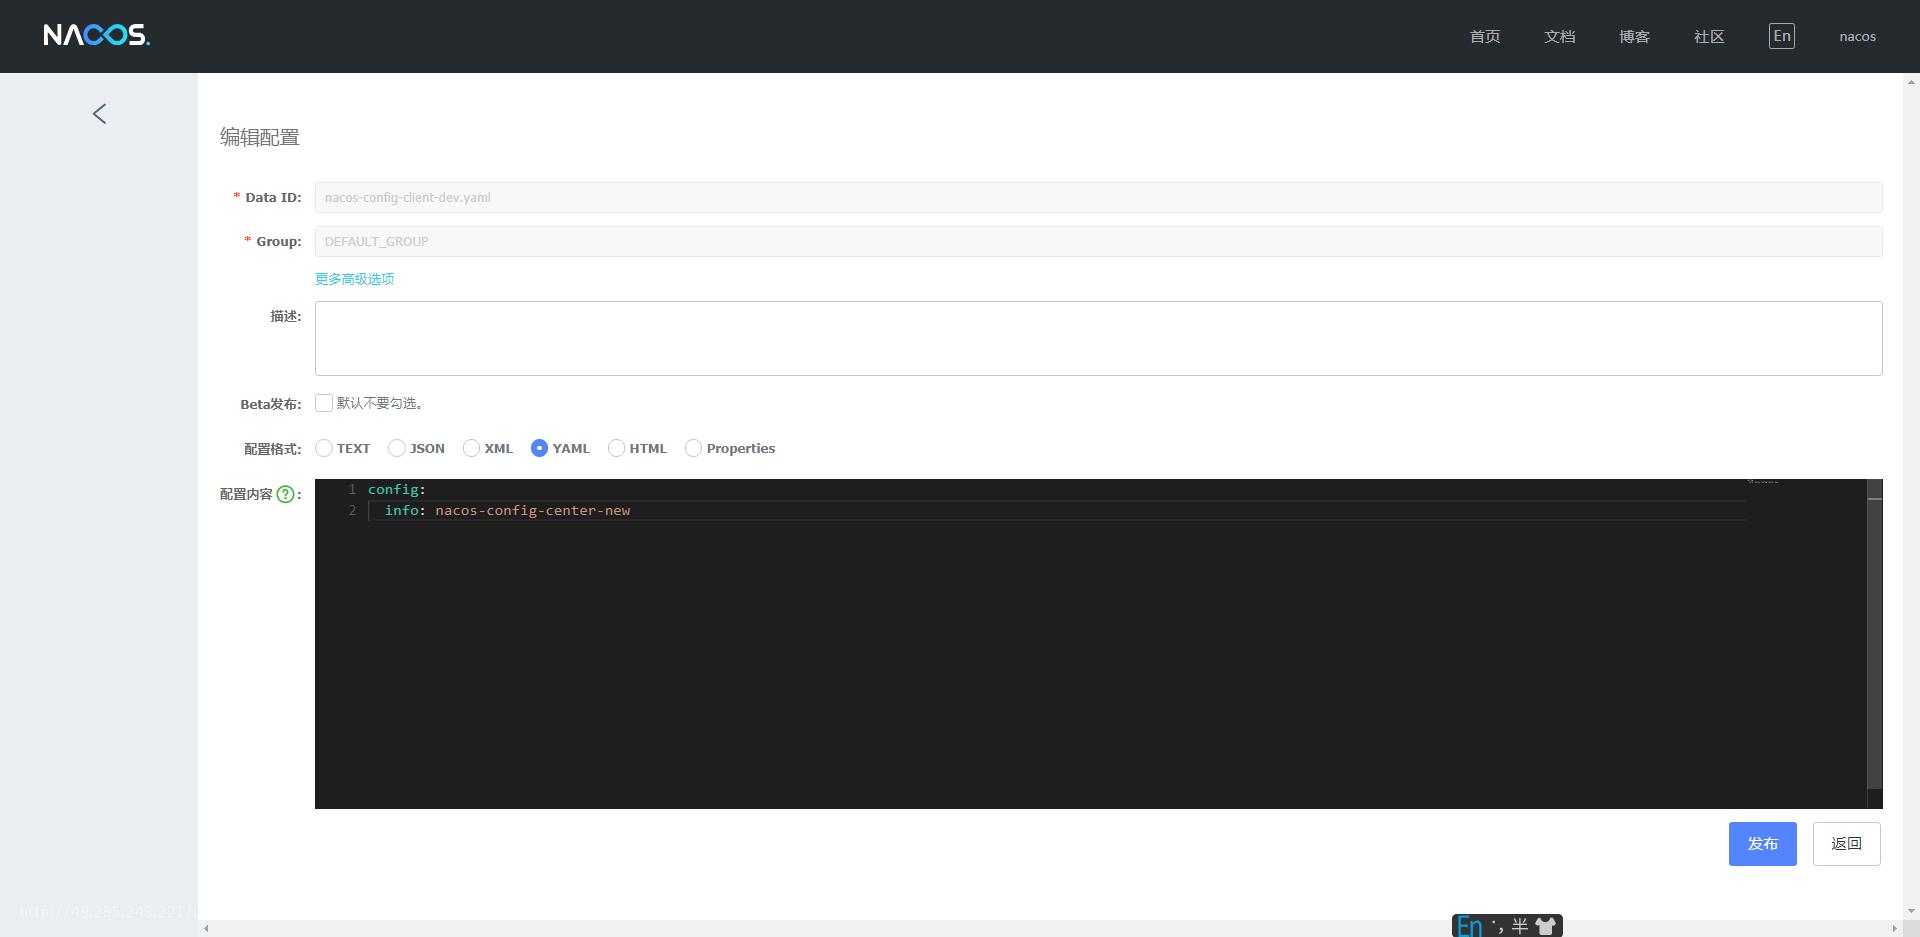
7、测试动态刷新
修改配置
8、访问:http://localhost:3377/config/info

附加:多个服务共享公共配置
子模块配置引入公共配置:bootstrap.yml
spring:
  profiles:
    active:
  application:
    name: child-module
  cloud:
    nacos:
      config:
        overrideSystemProperties: false
        server-addr: ${SPRING_CONFIG_URI}
        file-extension: yml
        shared-dataids: ibh-public-${spring.profiles.active}.yml
        refreshable-dataids: ibh-public-${spring.profiles.active}.yml
server-addr nacos注册地址
file-extension 配置文件后缀
shared-dataids 共享配置的dataid
refreshable-dataids 配置刷新
 恭喜注册成功,快来登录吧!